There are many ways to install packages; if you ask five different beekeepers you’ll get five different answers. In this post, we go over the basic details of installing your package bees. Over time you may develop your own method that works best for you.
What is a package of bees?
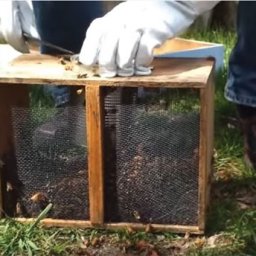
Packages of bees are just that: boxes specially built to ship bees safely and securely. These packages are sold by the weight of the bees, with roughly 3,000 to 5,000 bees per pound. Most packages range from two to five pounds and commonly come with a queen unless otherwise specified.
What equipment do I need to get started?
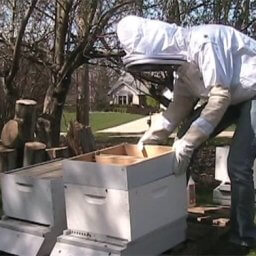
 Before you receive your package bees, be sure you have all the appropriate equipment ready. This includes a hive stand, screened bottom, single deep hive body with 10 wooden frames and a foundation with an entrance reducer and feeder installed.
Be sure to set up the components in the location you wish to keep your hive. Other materials that will make setting up your hive easier include a spray bottle filled with sugar water (pre-mixed at a 1:1 ratio), a hive tool, and a wood screw or other sharp instrument to help remove the cork in the queen cage.
Dadant & Sons Pro Tip: Find these and other helpful items online in our online catalog.
Components of a Package

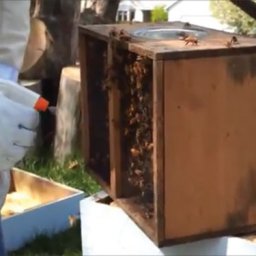
Before you begin, mist the bees with sugar water to help calm them. To make sure you mist all the bees in the package, you may need to gently jostle the bees by tapping the package on the ground. Be careful not to over-wet the bees, especially on cool days.
Got it! Now what?
You are now ready to begin installing the package.
With your hive assembled and the cover removed, pull out and set aside three or four frames from the middle to create a space for your new bees. Next, remove the wooden lid from the package with your hive tool, exposing the tin can used to feed the bees during shipping. Remove the strap holding the queen cage, being careful not to let the cage fall into the package.
- Place the package on its side over the space in the new hive where you removed the four frames and gently slide out the tin can.
Dadant & Sons Pro Tip: Add the remaining sugar water in the tin can into the entrance feeder.
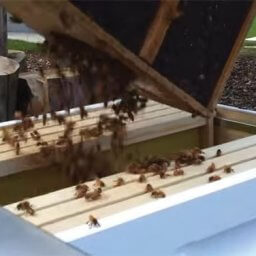
Gently pull the queen cage out of the package and set it off to the side on top of the frame. Turn the package upside down and gently shake it to help the bees fall into the hive. You may need to strike the side of the package to help move the bees into the hive.
Dadant & Sons Pro Tip: Don’t worry about getting every single bee out of the package. Once most bees are in the hive, place the open package near the front of the hive to encourage any remaining bees to enter.
Installing the Queen
- It’s now time to install the queen. We suggest leaving the queen in her cage for the first few days so the workers have time to become accustomed to her pheromones. There are several was to do this:
- In some queen cages, a cork covers a white candy plug that keeps the queen in the cage until the bees eat through the candy and release her. Use a wood screw or other sharp tool to carefully remove the cork and expose the candy.
- In other queen cages, there is no candy plug behind the cork. In this case simply leave the sealed queen cage in the hive for a few days before reopening the hive and gently removing the cork.
Dadant & Sons Pro Tip: If your queen cage does not have a candy plug, you can use a mini marshmallow to plug the opening after removing the cork. The workers will slowly eat through the marshmallow and release the queen.
Once you have prepared the queen cage, place it between two frames and use the pressure of the frames to hold the queen cage in place.
- Finally, replace the frames you removed in step one. Make sure to keep the proper spacing between the frames, and replace the hive cover.
Congratulations, you did it! After a week, check to see if the queen has been released from the cage or release her manually. This is also a good time to check the foundation and if the queen has started to lay.
You can also view a short video on the package installation process.
Have questions? Give us a call at 888.922.1293 or contact the closest Dadant branch.
For beekeeping equipment and educational materials, visit our online store.
 With your hive assembled and the cover removed, pull out and set aside three or four frames from the middle to create a space for your new bees. Next, remove the wooden lid from the package with your hive tool, exposing the tin can used to feed the bees during shipping. Remove the strap holding the queen cage, being careful not to let the cage fall into the package.
 Gently pull the queen cage out of the package and set it off to the side on top of the frame. Turn the package upside down and gently shake it to help the bees fall into the hive. You may need to strike the side of the package to help move the bees into the hive.
  Once you have prepared the queen cage, place it between two frames and use the pressure of the frames to hold the queen cage in place.